Tessellation - part 2
Tessellating an irregular shape
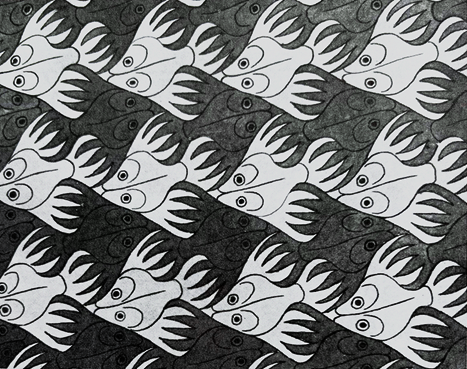
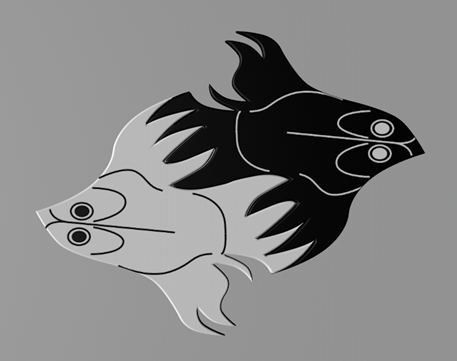
In the second part of this occasional series on tessellation, let's look at how to tessellate shapes which won't fit in a rectangular shape with parallel sides as was done in the previous part, and which therefore can't be tessellated using the translation method. In this part we'll create a version of another of Escher's classics - 'Fish'. As you can see in this image (apologies for the poor quality) there is a row of light-coloured fish alternating with a row of dark fish, which point in the opposite direction:
The method used for this is rotation about the midpoint of each side.
1. The guide shape
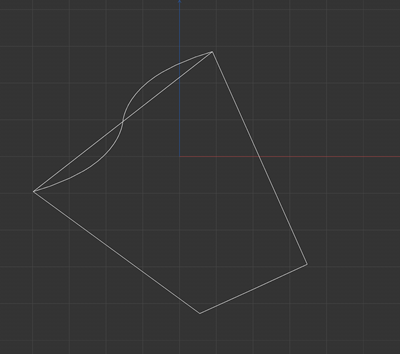
Since we know that any quadrilateral will tesselate, we can create a rough guide in the general shape of the object. In this case, this guide will do:
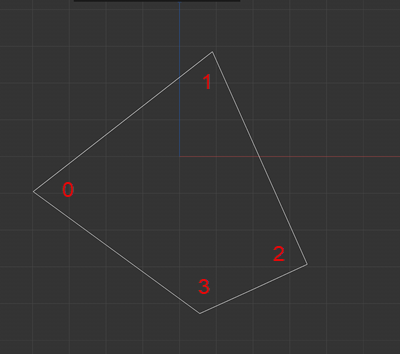
This shape has four vertices, numbered 0 to 3, and these are shown in the screenshot. The first thing is to add another point at the centre of each side. This can't be done by eye. No matter how close you get it, if it's not in the exact middle of the side, the object won't tessellate correctly. The easiest way to find the middle point between two others is to use a simple Xpresso rig. The rig would look like this:
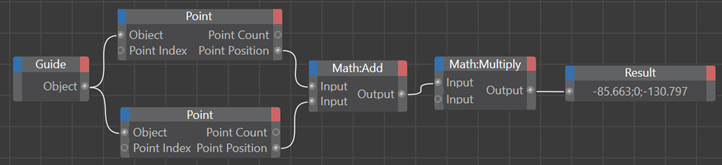
All it does is add two points together then takes the average by multiplying the sum of the two points by 0.5. That is the centre point between the two. So, if we set the index of the first point node to 0, and the second to 1, the result node will tell us the exact midpoint between the two. If we then create a new point somewhere on that edge, we can use the coordinate manager to set its location to that shown in the result node. Then all we need to do is repeat this for the other three sides. Bear in mind that adding a point between two others will alter the point order (in this example, what was point 1 is now point 2, and the new point which was added is now point 1).
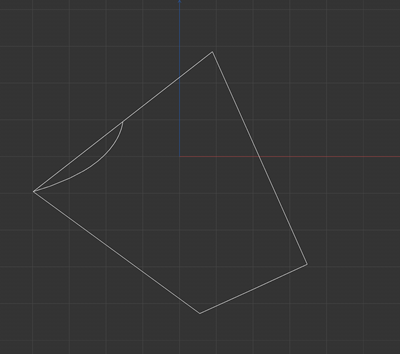
Having done all that, the guide shape should now have 8 points, 4 at the corners and 4 halfway along each edge.
2. The design
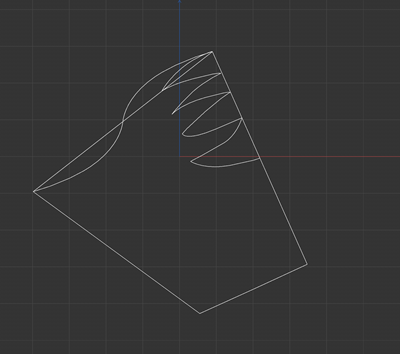
Now we can start designing our fish shape. It doesn't matter where you start or what order you go in. The only rule is that a spline starts at a corner point and ends at an adjacent mid-edge point. What happens in between is entirely up to you. In the case of this fish, we'll start at point 0 and draw to point 1, which is the next adjacent point. We get this:
This is just a simple curve with three points. Now the magic part. Duplicate the spline, rotate it through 180 degrees, and move it so that the end points snap to the guide mid-edge point and the next corner point. This is the result:
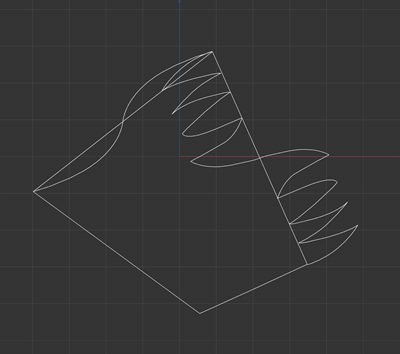
Now it's just a matter of repeating this along each edge. Here is the next spline, and then that one duplicated, rotated, and moved into position:
And the final result with the guide spline hidden:
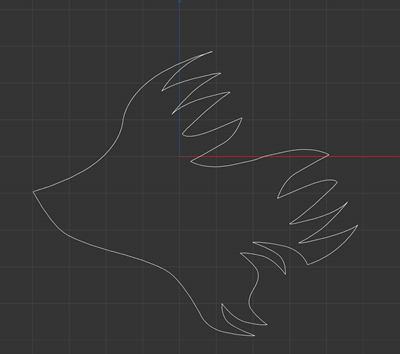
We now have 8 splines and they need to be joined to make a single spline. Don't forget to delete all the duplicate points you will get.
3. Extrusion and texturing
Now we can drop the spline into an Extrude object. A simple texture can be created in the paint app of your choice - you'll need one for the light fish and one for the dark.
4. Tessellating
Finally, duplicate the object, give one the light texture and the other the dark one. Rotate the dark fish through 180 degrees and move it into position like so:
Then just duplicate this pair, move them as necessary, then carry on duplicating and moving until you have as many as required:
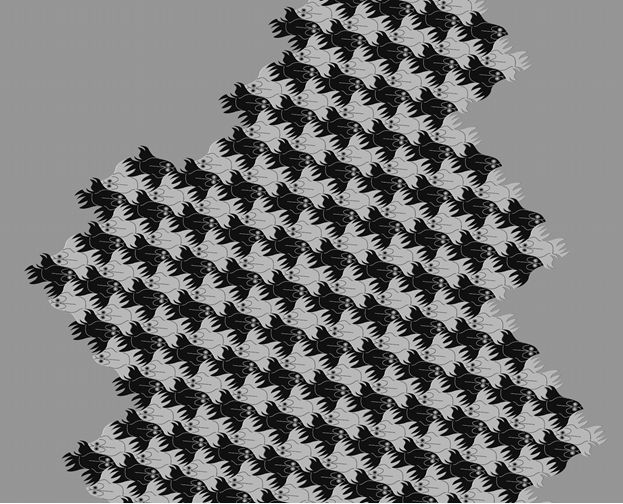
Hope you enjoyed this. You can see now how any shape can be made to tessellate even it isn't mirrored across two axes.
Page last updated August 5th 2025