Using Unity assets in Cinema 4D
How to import assets from the Unity store in Cinema
Unity is very widely used for game development and there is a huge number of assets in its asset store. Unfortunately these can't be simply downloaded and used in some other software such as Cinema 4D. This page demonstrates how to go about making these assets usable in Cinema (please check the asset license before doing this, though).
Create a Unity account
Before anything else, if you don't already have one you will need to create a free Unity account which you can do on the Unity website.
Install Unity
Now install Unity, which you do by downloading the Unity hub. The hub will install the game editor when you start a new project.
Find an asset
You can go to the asset store from the Unity hub or directly on the website. You will need to be logged in before you can select any assets. In the asset store you can if you wish select the 'Free Assets' option under the 'Pricing' menu. Of course, the best assets are likely to be paid-for ones! Once you find something you like, click 'Add to My Assets'. This asset is now available for use in a Unity project (once you have bought it of course, if it's not free).
Create a Unity project
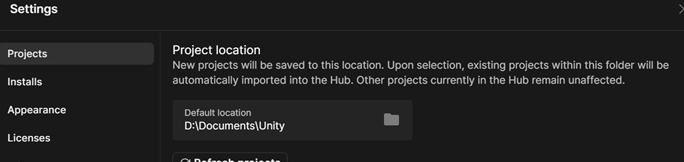
Now you're ready to download the asset. To do this, you need to create a Unity project. By default, Unity will create new projects in the folder \users\yourname\ which in the case of Windows will probably be on the Windows system drive (C:). This is a bit silly - many people have a relatively small system drive and a much bigger data drive, so I'd suggest changing that. You do it from the hub, where you can set the new default project location (click Settings->Projects):
In the main hub window, create a new project by clicking the '+ New project' button. This will download the Unity editor if this is the first project you are creating, then it will create the required directory structure and open the project in the editor. I've created a new project called 'AssetImporter' because I only intend to use this for importing Unity assets - I'm not actually going to build a project.
This gives an initial directory structure like this:
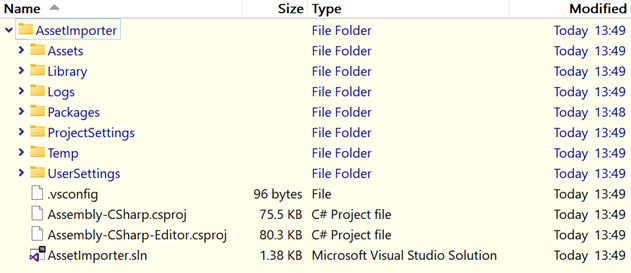
Any downloaded assets will go into the 'Assets' folder.
Import the asset from the 'My Assets' library
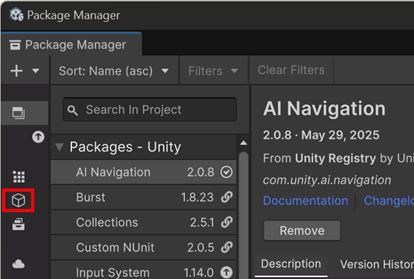
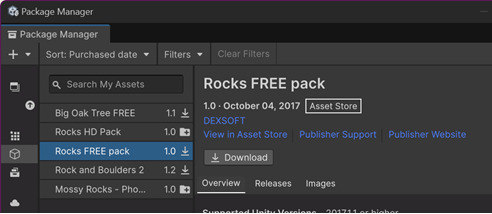
For this, you need the Package Manager (in the Unity editor, click Window->Package Management->Package Manager). When that opens, click the 'My Assets' icon (highlighted in the image):
This retrieves the list of your assets from the asset store. In my case, it shows this:
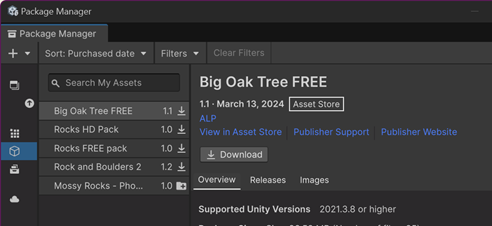
There are 5 assets in the list. I've already downloaded one - 'Mossy Rocks' and clicking that in the list shows this:

Clicking the button 'Import 1.0 to project' would add the asset to the project. Where an asset - such as 'Rocks HD Pack' - hasn't been downloaded yet, clicking it will show this:
If the 'Download' button is clicked, the asset file is downloaded and saved to disk. But where does it go? It's actually saved in the folder \users\yourname\AppData\Roaming\Unity\AssetStore-5.x\ROMPAS Studios\3D ModelsEnvironmentsLandscapes\Rocks HD Pack.unitypackage.
The final two folders and the package name will vary of course, depending on the asset creator and package. Now, this is of no use to us yet. We can't do anything in Cinema with a .unitypackage file. There are two ways to deal with this. Incidentally, the .unitypackage file format is actually a .tgz file, so it can be opened in something like 7zip, but it won't be of much help to do that as you will see if you try it.
Extract the assets with Unity
The first way (and probably the most future-proof) is to use Unity itself. Once the package has been downloaded, in the Package Manager the button has now changed to 'Import 1.0 to project', and if that is clicked, a window appears showing all the files in the asset. You can select/deselect any of these, or just leave them all selected, then click the 'Import' button.
The package is then unpacked and imported into the project. The 'Assets' folder inside the project folder now looks like this:
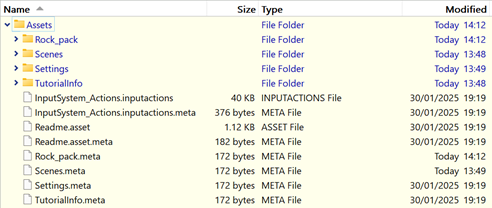
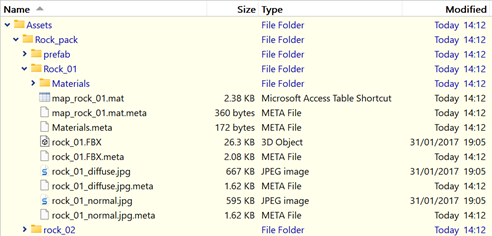
There's a new folder called 'Rock_pack'. Opening that gives this (I've also opened the 'Rock_01' folder - there are four different rocks included, each in their own folder):
Extract assets with a package extractor
There is a third-party solution for Windows simply called 'Unity Package Extractor'. You can download this from Github. What you get is a single file - 'extractor.exe'. You will need to copy the package file and the extractor to the same folder. Follow the github instructions and what it will do is create a folder called 'Assets' and unpack the asset package into it.
The only problem I can see with this is that it might cease to work if Unity update the package file in some way. Other than that, it's very fast and you don't need to run Unity to access the asset (although you did to download the package, so...).
And finally...
However you opened the package, all you need to do now is load the 'rock_01.FBX' file into Cinema. A material will be created, but it probably won't be populated with any textures. You'll need to add those manually - in this case, 'rock_01_diffuse.jpg' for the colour map and 'rock_01_normal.jpg' for the normal map. Other assets may have a slightly different folder structure or have additional texture files and may unpack them into a separate sub-folder, but the meshes and textures will be in there somewhere. It's usually pretty easy to figure out what is what. Note that there may also be several meshes for the same object for different levels of detail.
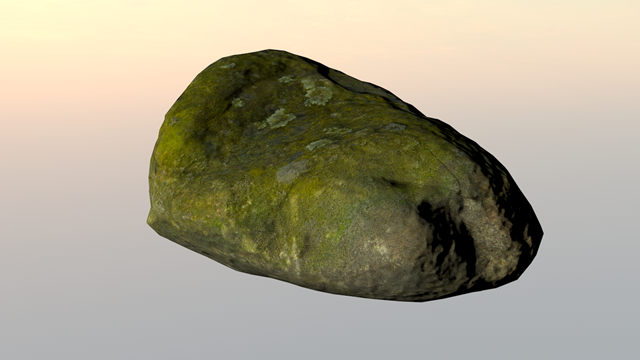
You can of course copy just the mesh and texture files into a completely different folder on your system, then delete the 'Rock_pack' folder to save space. As an example of the asset quality, the 'Mossy Rocks' asset is a nice one, producing this in Cinema:
So there it is - how to use Unity assets in Cinema 4D. The Unity assets store contains a large number of assets, of which about 10% are free and can be very good. Of the paid-for assets many are very high-quality and worth considering for purchase. It's useful to be able to use these in Cinema but do check the licensing requirements before using them! It's our responsibility as users to check the license especially if they are going to be used for commercial purposes.
Page last updated August 15th 2025